Taking pictures is an art. We all love to take pictures. We can find a lot of people who are earning a lot of money through this art. When you are using an iPhone for taking pictures, it will give you another level of thrill. There are some basic rules for having a sparkler picture with an iPhone. Taking sparkler pictures with an iPhone can be a fun and creative way to capture light trails and create extraordinary photos.
Here’s Some basics guidance to help you is given below:
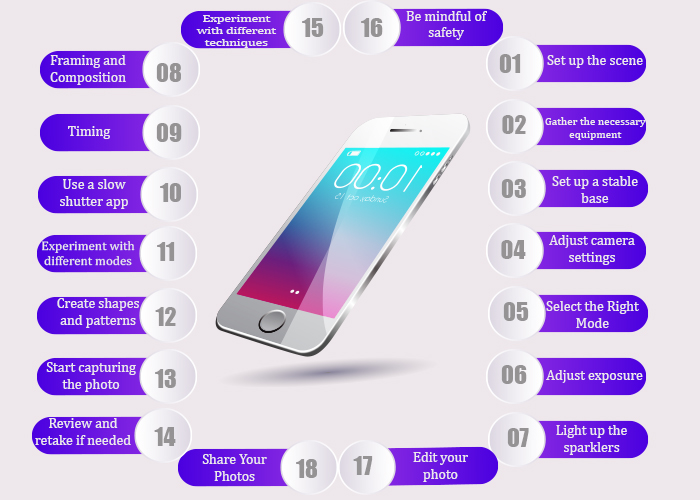
Set up the scene:
Find a safe and open space outdoors or indoors where you can use the sparklers without any risk of fire or accidents. Consider the background and surrounding lighting conditions for a good visually appealing shot or you may choose a dark environment with minimal ambient light to enhance the sparkler’s glow. A dark or dimly lit environment, such as a backyard, park, or beach.
Gather the necessary equipment(How to take sparkler pictures with an iPhone):
Apart from your iPhone, make sure you have sparklers, a lighter or matches, and a tripod (optional but recommended), and a partner who will help you to do so (Optional but not recommended).
Set up a stable base:
Use a tripod or find a stable outward to minimise camera shake. It will help maintain clarity and sharpness in your photos. If you don’t have a tripod or something like it , you can prop your iPhone against a stable object or use a makeshift stand.
Adjust camera settings:
First, open the native camera app on your iPhone and switch to the “Slow Shutter” mode. This mode allows you to capture long / short exposures and helps create the light trails. You can also use third-party camera apps like Pro Camera, O2 Cam, Slow Shutter Cam, or Manual for more control over the settings.
Select the Right Mode:
For most of the iPhones, you can use the default Photo mode. However, if you have a newer iPhone (like the iPhone 14 or later), you can try using the Night mode for better results at day time also.
Adjust exposure:
You can Top and hold on the brightest area of your frame to lock the exposure and focus. You can also use other apps that allow manual control over exposure settings for more precise adjustments.
Light up the sparklers:
Carefully light up the sparkler(s) using a lighter or matches, and position yourself or your subject or your objects accordingly.
Framing and Composition:
Decide on the composition of your shots. You can capture people holding sparklers, or draw shapes or words, or create light trails. Consider using the rule of thirds to compose your shot. It involves placing your subject off-centre for a better visually appealing result.
Timing:
You have to make sure your subjects are ready with their sparklers. You can start the exposure (shutter button) just before the sparkler is lit to capture the entire trail of lights. The longer you expose the shot, the longer the light trails will be for having a desired result. You Can experiment with different exposure times for varying effects.
Use a slow shutter app:
If you want to capture longer light trails, consider using a slow shutter app. These apps allow you to extend the shutter speed, resulting in more pronounced sparkler trails as your preference.
Experiment with different modes:
Some newer iPhone models such as iPhone 14 or iPhone 15 have a “Night Mode” or “Long Exposure” mode built into their native camera apps. You can try experimenting with these modes to see if they provide the desired effect.
Create shapes and patterns:
Encourage your subjects to move or change the position and draw with the sparklers while you capture their movements. It can result in captivating shapes and patterns in your impulse photos.
Start capturing the photo:
Tap the shutter button or set a timer on your iPhone to allow yourself time to get in the frame by itself. Hold the sparkler(s) in a way that creates interesting shapes or patterns & move them around slowly as you need. The slower and smoother your movements, the longer and more pronounced the light trails will be.
Review and retake if needed:
Once you’ve taken the picture, review it on your iPhone screen easily. If you’re not satisfied with what you have taken, you can retake the shot by adjusting your movements or trying different sparkler patterns.
Experiment with different techniques:
To add more creativity to your sparkler pictures, you can try various techniques like writing words, drawing shapes, or spinning the sparklers around in circles or filters.
Edit your photo:
After capturing your sparkler pictures, you can enhance them further using photo editing apps like Adobe Lightroom, VSCO, or Snapseed or O2 cam. Adjust the brightness, contrast, beautify, and colour tones to your liking to make the picture more visually appealing.
Be mindful of safety:
It’s crucial to prioritise safety during a photoshoot involving sparklers or with other objects. Ensure that you are in a safe environment or in a safe place and take necessary precautions to avoid accidents or injuries. You have to keep in mind that nothing is more precious than your life or your physical fitness.
Share Your Photos:
Once you’re satisfied with your sparkler pictures, you can share or post them on social media such as Facebook, Instagram, Tweeter, linkedin, or many more connecting sites, with friends and family to spread the joy of the moment.
Sum Up
How to take sparkler pictures with an iPhone is an intresting topic to talk about. We need to keep in our mind that experimentation is prime when it comes to sparkler photography. Maybe some time, you may try your level best to capture one desired picture, but fail. Always,remember that, practice makes a man perfect. So, practise, and play around with different settings and techniques to find your desired results or best result. Enjoy the process and have fun capturing those sparkling moments.